Thursday, January 24, 2013

Bat Rabbit's Menu Keepers

There are always a few staples on the menu.  Those things that you think patrons would get tired of but instead they just keep ordering them.  They are called keepers.

Here are two of Bat Rabbit's Keepers.


A favorite at Bat Rabbit’s is the Mini Lemon Tarts.  Since they are not made with the traditional lemon curd, they are a much lighter treat.


Mini Lemon Tart Recipe


I admit it.  I hate making any type of crust.  Luckily, in the super markets these days, you can usually find frozen tart shells of all sizes.  I’ll use them every chance given to me.   

Lemon Filling:
15 oz.  sweetened condensed milk
1   tube frozen lemonade
12 oz.  whipped cream

Place all filling ingredients into a bowl and with a wooden spoon stir, and stir, and stir, and stir.  Once most of the lumps have disappeared, stir a little more.  Place your prepared mini-tart shells on a cookie sheet.  Cram as many on there as you can.  Fill each shell with the lemon filling.  Place the cookie sheet with the lemon tarts in the refrigerator for the filling can thicken up.


Traditional English Trifle


One of the easiest and most versatile Tea treats is the traditional English trifle.

Begin with a large footed bowl.  Then alternate layers of sponge or pound cake, egg custard or pudding, sliced strawberries and whipped cream covered with slivered almonds. Repeat each layer until the bowl is filled.

Custard and pudding flavors may be changed to taste as well as seasonal berries.

Tuesday, January 22, 2013

Cream for Scones


Once you have scones, you must provide cream and jam.  I confess, I do not make my own jam.  I buy the the best quality, seedless fruit jam.  I am partial to raspberry myself.  Cream, on the other hand, can be more of a challenge here in the states.  Being the tea rebel that I am, I prefer to whip up some good ole' thick whipping cream for my scones but there are others who are more traditional.  For them, I do try to provide a more 'proper' cream.

Below are several recipes.  They each have a different consistency and taste.  Your best bet is try them all and then determine which you prefer.


Clotted Cream / Devon Cream

When speaking or reading of tea, you will see many references to Clotted Cream and Devon Cream.  Basically, Clotted Cream contains a minimum of 55% milk fat, while Devon Cream's fat content is lower at 48% milk fat. Devon Cream comes from the cows of Devon, England.  The true articles can be a bit ticky to get in the states but there are many recipes on how to ‘fake’ them.  Use can use the same recipes for both types of creams.  The difference is in the fat content only.


Recipe #1 - Easy
  • 1 c heavy cream
  • 1 c sour cream
  • 1 t vanilla
  • 4 T confectioner's sugar
      Mix together sour cream and vanilla.
  1. Beat cream in a cooled bowl. When have medium-stiff peaks, sprinkle on sugar and continue to beat. When sugar is integrated and peaks are stiff, gently fold in sour cream/vanilla mixture.

Recipe #2 - Easy
  • (3 ounce) package cream cheese
  • 1 tablespoon white sugar
  • pinch salt
  • 1 cup heavy cream
In a medium bowl, cream together cream cheese, sugar and salt. Beat in cream until stiff peaks form. Chill until serving.  

Original recipe makes 2 cups


Recipe #3 – Time Consuming

2 cups heavy cream
  1. Cook cream in top of double boiler over simmering water until reduced by about half. It should be the consistency of butter, with a golden "crust" on the top.
  2. Transfer, including crust, to bowl. Cover and let stand 2 hours, then refrigerate at least 12 hours.
  3. Stir crust into cream before serving. Keep unused portions refrigerated, tightly covered, for up to 4 days.
Makes about 1 cup.


Recipe #4 (Alton Brown’s) – Time Consuming

      2 cups pasteurized (not ultra-pasteurized) cream

      Set a coffee filter basket, lined with a filter, in a strainer, over a bowl. Pour the cream almost

      to the top of the filter. Refrigerate for 2 hours. The whey will sink to the bottom passing 
      through the filter leaving a ring of clotted cream. Scrape this down with a rubber spatula and 
      repeat every couple of hours until the mass reaches the consistency of soft cream cheese.

Monday, January 21, 2013

Bat Rabbit's Super Secret Scone Recipe


Scones are a must.  They must be light with a crumble but they must keep there shape.  I have spent many years perfecting my scone recipes.  The the first time EVER, I am sharing it.


Scones are traditionally served with afternoon tea and accompanied by jam and clotted cream. You can add a variety of treats into the batter, such as raisins, fresh apple bits, orange peel, cranberries, and chocolate chips, although I prefer plain. At Bat Rabbit’s, we usually serve raspberry, currant or strawberry seedless jam and fresh whipped cream with our scones.

The secret Bat Rabbit’s Basic Scone Recipe


  • 4 cups of self-rising flour
  • 2/3 cup confectioner’s sugar
  • 2 teaspoons baking soda
  • 2 sticks cold, unsalted butter
  • 1 cup heavy whipping cream
  • 1 tablespoon vanilla extract
  • 1 tablespoon almond extract

Preheat oven to 350 degrees.

In large bowl, sift together flour, sugar and baking soda.  


With fingertips, rub butter into flour mixture until it resembles fine bread crumbs.  


With fork, stir in cream, vanilla and almond to form a soft dough. 


On a lightly floured surface, roll dough out to 1” thick.  


Cut into 2” rounds.  


Arrange on a greased baking sheet.  


Brush with additional heavy cream and sprinkle generously with confectioner’s sugar.  


Bake 15-20 minutes or until golden brown.

Makes 18-24 scones.

Saturday, January 19, 2013

Bat Rabbit's Tea Sandwiches


I am reviewing the menu's here at Bat Rabbit's so over the next few days, I thought I would share some of our more common (and secret) recipes!

I'll start with the all important Tea Sandwich.


Tea sandwiches are traditionally delicate sandwiches sliced small enough to be picked up with the fingers or a pair of sandwich tongs. Teas sandwiches can be cut into triangles or rectangles. White, rye or wheat bread, with the crusts cut off, can be used for these sandwiches.

CUCUMBER SANDWICHES
  1. Cut crusts off of the bread and cut into triangles, butter both sides of the bread.
  2. Cut seedless cucumber (sold in gourmet supermarkets, always wrapped in cellophane) into very thin slices, and place between bread slices.
  3. Garnish if desired.
TUNA SANDWICHES
  1. Mix tuna salad and season as desired.
  2. Spread on prepared slices of bread. You may add thin slices of cucumber if desired along with garnish.
EGG SANDWICHES  ***
  1. Mix egg salad and season as desired.
  2. Spread on slices of prepared bread.
  3. Add thin slices of cucumber if desired, along with garnish.
WATERCRESS SANDWICHES
  1. Spread cream cheese on prepared slices of bread.
  2. Rinse and dry watercress and lay between slices of bread.
  3. Garnish if desired.
CHICKEN SANDWICHES  ***
  1. Mix chicken salad and season as desired.
  2. Spread on slices of prepared bread.
  3. Add thin slices of cucumber if desired, along with garnish.
TURKEY SANDWICHES  ***
  1. Spread herbed cream cheese on prepared slices of bread.
  2. Lay thin slices of turkey between the slices of bread.
  3. Garnish if desired.
*** Some of Bat Rabbit’s Favorites.

Thursday, January 17, 2013

Tea Etiquette – Protocols

At the end of each description, you will see my notes marked with **A.L.W.**. While these are ideals that are described, it is rarely seen in daily practice, especially at Bat Rabbit's.

Teapot and Pourer
The tea pot and tea kettle are placed with the spout facing the hostess.
Tea should be served by the host/hostess or a friend, never a servant.
Do not pour multiple cups at a time and pass several cups at a time. Guests should take their cup directly from the server.
**A.L.W.** - At Bat Rabbit’s, either I serve the tea or it is self serve.  And yes, I am a huge fan of Downton Abbey!

Utensils
When in doubt, use the utensils from the outside towards the inside of the place setting.

A petit knife and fork may be used together for use on an open face sandwich, preferably not on a closed sandwich. If savories are properly made, nothing will be dripping or gooey. However, with the fun of non-traditional foods now served on Afternoon Tea menus, this is not always the case. A petit knife and fork is proper for use with one’s pastries.

Never place used utensils on a cloth or table. When not in use rest the utensil on the right side of the corresponding plate.  Use a knife rest if it is provided.

**A.L.W.** - You will never have to worry about a ‘petit knife and fork’ at Bat Rabbit’s.  Everyone has good ole regular knives and forks available any time they need them.

Napkins
When excusing oneself from the table, whether during or after a dining experience, is proper to place one’s napkin to the left side of your place setting not in your chair. This rule is not negotiable for the simple reason if one’s napkin were soiled it could damage the seat covering, damage that may be either costly to repair or irreplaceable. While the risk for soiling a cloth also exists, the cloth can be washed with relative ease.
Upon completion of a dining experience, a napkin folded with a crease and placed to the left side of your place setting.  That indicates to your host or hostess that you wish to be invited back.
The host or hostess picks up his or her napkin to signal the end of the tea. He or she makes certain all of the guests have finished before making this move.

**A.L.W.** - I’m lucky if the napkin has not been kicked to an unrecoverable spot under the table.

Making the Tea
Heat the teapot with boiling water first, the pour it out, leaving an
empty hot teapot.
Then place the tea leaves in the teapot. The amount of tea used is dependent on the quality and quantity of tea.
Pour boiling water in the pot. Let it diffuse for five to eight minutes.
To serve different "strengths" of tea from the same pot, pour half tea, half boiling water into the cups of those who prefer their tea weak.
Note:
When tea has to stand a long time, the ideal way is to make a strong infusion in a big kettle on the stove.  Let the tea actually boil three to four minutes on the range, then pour it through a sieve or filter into your hot teapot. The tea will not become bitter, and it does not matter if it gets quite cold.  The boiling water poured over no more than the tablespoonful of such tea will make the drink hot enough. 

**A.L.W.** - We serve it by the pot in one strength.  You get used to it..

Milk and Lemon
First, milk is served with tea, not cream. Cream is too heavy and masks the taste of the tea.
But the real question is do you add the milk first or last?  This is hotly debated in many tea circles.  Here is my opinion.  Milk is poured after the tea. Don't put the milk in before the tea because then you cannot judge the strength of the tea by its color.
Where did this old milk-first tale come from? Samuel Twining has theorized that milk first prevented early china from cracking in reaction to the hot water.
Thinly sliced lemons are preferable to lemon wedges.  Lemon should be placed on a dish near the milk and sugar. A lemon fork (with splayed tines) or a similar serving utensil is provided. The tea pourer or the tea drinker can then put a slice directly into the poured cup of tea.
Should you desire another cup of tea, remove the slice of lemon from your cup and place it in a waste bowl and then pour your tea. You may then add a fresh lemon slice.

Never:
  •     Add lemon with milk since the lemon's citric acid will cause the proteins in the milk to curdle.
  •     Put the lemon slice in the cup before pouring the tea.
  •     Placing a lemon slice on the edge of the saucer in anticipation of adding it later.
  •     Transfer the lemon slice from the cup of tea to the saucer.
  •     Use the spoon to press the lemon slice after you place it in the cup. Untouched, the oil from the peel and the juice from the fruit will provide the desired essence.
**A.L.W.** - Lemon only on request and it will be in wedges and served with a regular spoon and fork, sorry. 

How to Drink Tea
Originally, all porcelain teacups were made in China.  These small cups had no handles. In order for one not to spill the hot liquid onto oneself, the proper way to hold the vessel was to place one's thumb at the six o'clock position and one's index and middle fingers at the twelve o'clock position, while gently raising one's pinkie up for balance.
In Europe, when the Meissen Porcelain Company, in 1710, introduced the handle to the teacup, the tradition continued. By placing one's fingers to the front and back of the handle, called pinching the handle with one's pinkie extended downward or to the side, pinkie up, again allows balance. It is not an affectation, but a graceful way to avoid spills.


Never:
  • Loop your fingers through the handle.
  • Use your tea to wash down food.
  • Slurp.
  • Wash food down with your tea, always swallow completely before continuing.
  • Swirl your tea as if it were wine in a glass.
**A.L.W.** - Just about anything goes at Bat Rabbit’s just don’t break my cups.

Stirring Tea in a Cup

      Stirring a cup of tea is done gently and noiselessly. Do not allow the teaspoon to touch the sides or rim of the cup. Remove the spoon and place it on the saucer behind the cup, with the handle of the spoon pointing in the same direction as the handle of the cup. Visualize the face of a clock on the saucer and properly place the handle of the cup and the handle of the spoon at four on the clock.

Never:

        Leave a spoon upright in the cup.
        Place the spoon on the saucer in front of the cup.
        Make unnecessary noise by touching the sides of the cup with the spoon while stirring.
        Let the spoon drop, after stirring the tea, with a clank onto the saucer.

**A.L.W.** - This just makes me laugh!
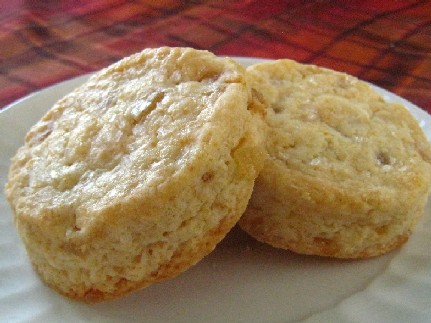
How to Eat a Scone
      It is improper to slice a scone horizontally to be slathered in jam and cream. 

The correct manner in which one eats a scone is to place the jam and cream you will be using onto your plate. From that, apply just enough jam and cream on the scone for a single bite.

A fork may or may not be used to eat a scone. No dipping.

Never use your own utensils to dip into the jam or cream dish.

**A.L.W.** - I never go through the trouble of slicing a scone in half.  Once the scone, cream and jam have been regulated to your plate, have at it any way you wish.  Preferably, I dip my scone in the whipped cream.  I am such a rebel.

Tuesday, January 15, 2013

Lollipops!

Last fall, when I hosted one of the Bat Rabbit's Halloween Teas, I had the brilliant idea of making homemade  lollipops as favors.  They turned out to be much easier than I anticipated.  Here is the basic recipe I followed:

2 cups granulated sugar
2/3 cup light corn syrup (I used clear Kyro syrup)
¾ cup water
1 dram  candy flavoring  (I used LorAnn Apple flavor)
½ tsp. food coloring (I used the coloring I already had and added it until I was happy with the color.)

Prep lollipop sticks on a silpat and/or parchment paper (wax paper will NOT work) covered cookie sheet.  Combine sugar, corn syrup and water in 2 qt. saucepan.  Stir over medium heat until sugar dissolves.  Bring mixture to boil without stirring.  When syrup temperature reaches 260 degrees Fahrenheit, add color.  Do not stir; boiling action will incorporate color into syrup.  Remove from heat at 300 degrees Fahrenheit.  After boiling action ceases, stir in flavoring – avoid rising steam when stirring.  Free form pour the syrup by the spoonful over lollipop sticks.  

The most important thing is to watch the temperature and follow the instruction to a tea (see what I did there).

I wanted to make these cute little green monter'ish lollipops.  I used a neon green food coloring and candy eyes.

First, I laid out the lollipop sticks and eyes that will need to put on the lollipops.


I do not have any pictures of me actually cooking up the mixture.  I had to pay close attention to what was going on in order not to burn either the candy nor me.  Sorry about that.  

You can get an idea of how I poured the hot candy over the sticks in the photo below.  Once all the lollipops had been poured, I immediately placed the eyes on the lollipops.  While all the ones below have two eyes, I also had some with one and a few with three eyes.


Once the lollipops hardened, I placed them in clear bags and tied a lovely contrasting black ribbon around the bottom to close them.


I thought they turned out right well!


Monday, January 14, 2013

Three Tiered Curate Stand


I almost forgot one of the pivotal serving pieces in my previous entry.  I don't know how I could have forgotten....

Another serving piece that is commonly used with Afternoon Tea is the three-tier Curate Stand.  It is especially useful for a small tea of two to three people.  As with everything else, it follows a specific propriety when being used for tea.


The top tier is for scones.

The protocol of placing the scones on the top tier is due to the fact that during the 1800s when Afternoon Tea first became popular, and modern conveniences did not exist, a warming dome was placed over the scones. The dome would only fit on the top tier.

The middle tier is for Savories and Tea sandwiches.

The bottom tier is for the sweets.

At the progression of each course, service would be provided to remove each tier.

**A.L.W.** - Service provided to remove each tier?  I suggest you simply move to the next tier at your convinence and don’t you dare tear my stand apart layer by layer.